|
ASP Underdrive Crank Pulley INSTALL:
Here is a quick write up on the installation of an ASP underdrive pulley....
I have included the Tools necessary as well as some instruction that will make this install a piece of cake.
|
|
|
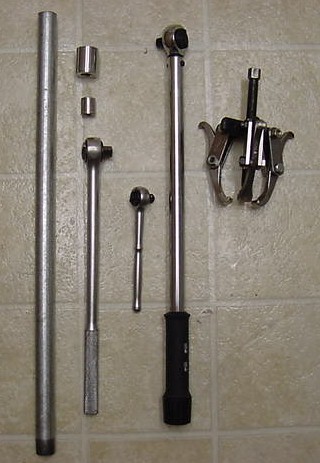
Tool Required:
From Left to Right:
-24" Piece of pipe (for use w/ Breaker-bar)
-18" 1/2" Breaker-bar, 15/16 socket (1/2"), 15mm Socket (3/8")
-3/8" Socket wrench
-Torque wrench (Capable of 250 Ft. Lbs)
-3 arm pulley Puller (Part # 2768RT...from Pepboys)
|
|
|
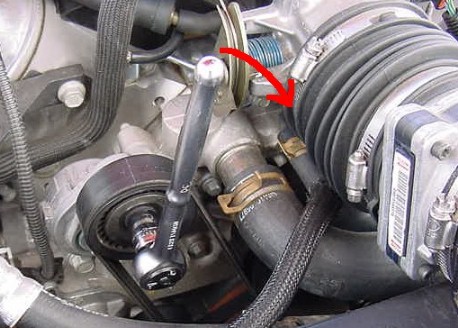
STEP 1: Remove the serpentine belts (2 of them).
Using the 15mm socket, remove tension from the belts. To do this, simply apply pressure to the wrench in a downward/Clockwise postion. The "Belt tensioner" pulley will rotate downward and remove tension. Just pull the belt off. This method works for both belts.
|
|
|
STEP 2: Loosen Crank pulley Bolt
If you have a M-6, put it in 5th gear. This will prevent the crank from turning when breaking the crank bolt loose. Using the 18" Breaker-bar (along w/ the 24" Pipe...if necessary) loosen (DO NOT fully remove)the Crank pulley bolt. You want to leave the bolt still threaded just slightly. The bolt will provide the "base" on which the pulley puller will rest on. |
|
|
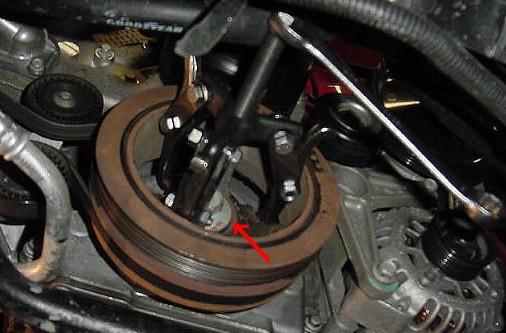
STEP 3: Remove Pulley
Attach pulley puller (Part# 2768RT) to the INSIDE hub of the pulley. DO NOT USE THE OUTSIDE DIAMETER...YOU WILL DAMAGE THE PULLEY. Notice the red arrow points to the Crank bolt still in place (although almost completely backed out). After the pulley is attached, begin tightening the Pulley-puller...as it tightens, the Pulley will begin to inch it's way off the crank snout. Unfortunately the Crank bolt isn't long enough to allow the pulley-puller to fully seperate the Crank Pulley from the snout. To completely seperate it, we had to use a small pry bar. (If you do this...BE GENTLE! You do not want to damage the crank.) After a few gentle pry's at various points around the pulley, it fell off into my hands.
|
|
|
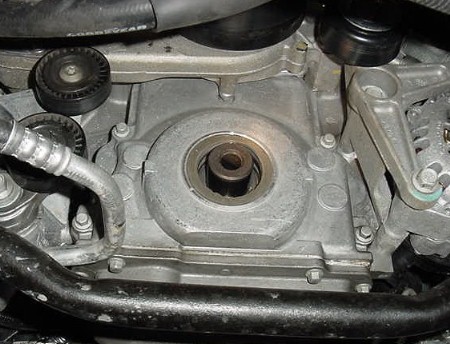
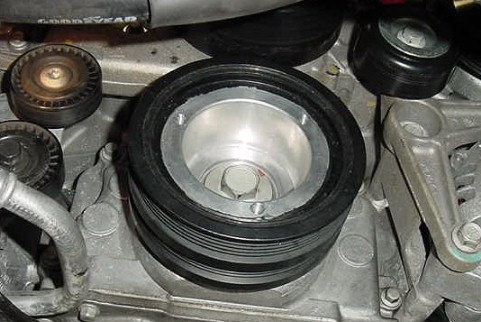
Post Pulley removal
If you've done everything correctly to this point, this is what it will look like. |
|
|
STEP 4: Install ASP Underdrive Pulley
Lubricate and mount the ASP pulley onto the snout. You should be able to press it on just far enuff to allow the STOCK crank bolt to begin threading. Once it is threaded, tighten it to 240 ft. lbs. or until it is completely seated on the crank snout. Afterwards, REMOVE THE STOCK BOLT and replace it with the NEW CRANK BOLT. You will tighten the NEW bolt to 37 ft. lbs. and then turn it an additonal 120 degrees.
You are almost finished. Afterwards, re-install the new belts (shorter belts), using the diagram located on the driverside fenderwell in the engine bay.
|
|
|
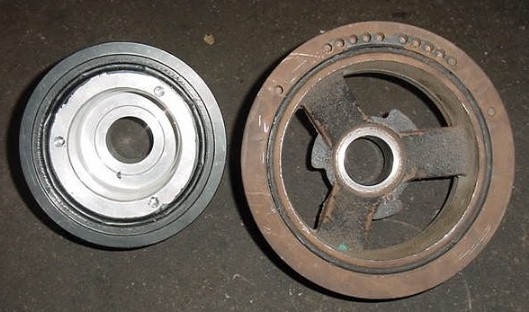
Stock Pulley vs. ASP pulley
You can easily see the huge difference is size. The ASP is a little lighter as well. |