|
White Face Gauge Install: STILL UNDER CONSTRUCTION
This is a basic installation guide on the installation of NR Auto's White face gauges....
Before begining installation, take the car for a spin making sure to allow the engine to reach operating temperature. IMPORTANT: Using a digital camera or pencil/paper....record the exact position of each individual gauge. This is extremely important when re-installing the gauge pod. Also, Autotap will need to be be used to reset MPH gauge needles (and everything else but oil pressure) after installation.
TOOLS:
1/4" or 3/8" Socket wrench
6" socket extension
7mm Socket or Nut driver
Small flat-edge screwdriver (for prying)
|
|
|
Remove Plastic exterior frame-piece
Using the 7mm socket/nut-driver remove the 2 hex head screw holding the plastic frame-piece in place. |
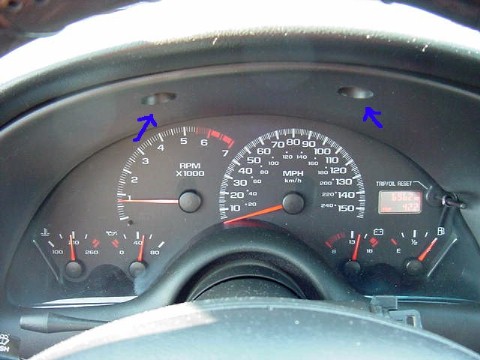
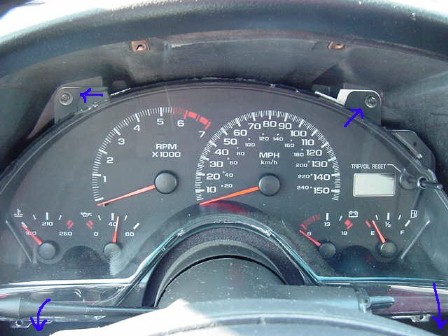
Removal of entire Gauge pod
Again using the 7mm socket/nut-driver, remove the 4 (2 top and 2 hidden on bottom) hex head screws. This will allow removal of entire gauge pod, keeping it in one piece. |
|
|
|
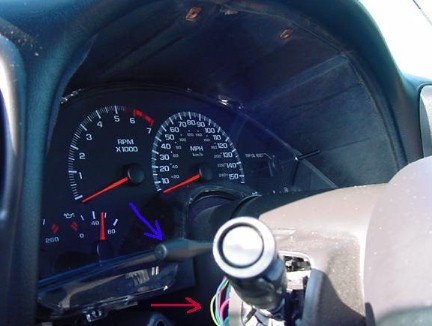
Before attempting removal, it may be necessary to.....
Remove the Tilt steering stalk (BLUE ARROW) and small plastic housing (RED ARROW) containing the wiring for Turn signal operation.
The Tilt steering stalk is easily removed by simply unscrewing it from the steering column. The plastic housing is easily removed by pressing in on the edges and pushing downward.
After removal of those 2 items, gently work the gauge pod out, being careful not to scratch plastic lense.
|
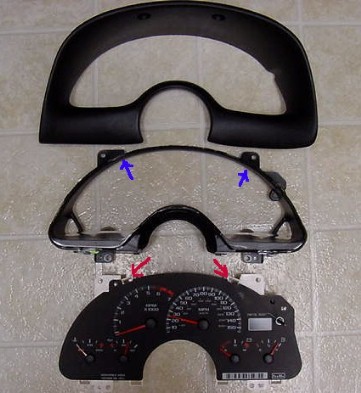
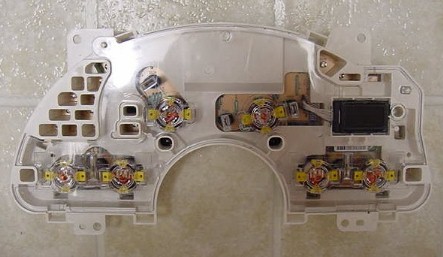
Seperation of Plastic lense from gauges
Using flat head screwdriver gently press down on the 2 tabs (BLUE ARROWS) and pull lense away from gauge pod tabs (RED ARROWS). Set the plastic lense aside for the moment.
|
|
|
|
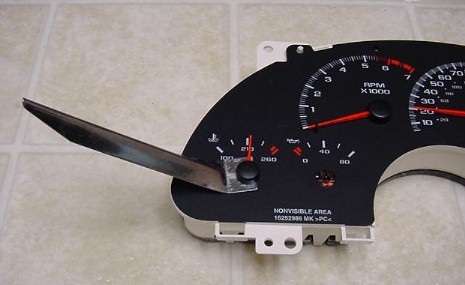
Removal of Gauge Needles and Stock gauge Face
Using provide "Needle Removal Tool" (or similar tool), carefully pry up the needles and set them in a safe place.
After removal of needles, you must now PEEL the Stock gauge face away from the gauge pod. (If done properly, the Stock face can be salvaged and used again later on if needed.)
Again...using careful deliberate motions...from the edge, gently begin peeling the gauge face away from the plastic cover. Peel one small section at a time, working from different angles, moving towards the center. After successful removal, make certain that there is NO REMAINING GLUE on the plastic gauge pod surface. Remaining glue will interfere with night-time illumination of the White-face gauges.
|
Replacing Stock face with Aftermarket Gauge face
After plastic is completely clean, place the aftermarket face onto the gauge pod...making certain that everything lines up properly.
After face is satisfactorily installed, re-insert stock needles to proper places. Re-install the bare (no lense) gauge pod back into vehicle. Leaving the plastic lense off, will allow adjustment of needles while engine is running (don't adjust needles while car is moving!). After needles are properly set, replace the plastic lense, and reassemble everything going in reverse order.
|
|
|
|
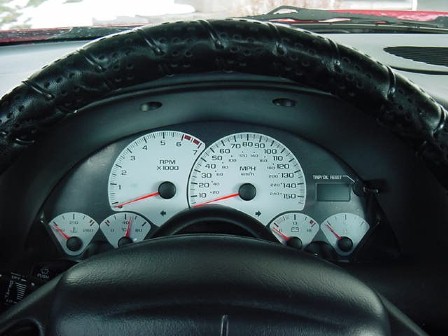
Completed Gauge Install
When everything is finished....this should be your view. Very nice improvement over stock. |